

Wondering how long new windows really take? This guide explains the typical window replacement timeline for Canadian homeowners, from planning and measuring to ordering, installation, and final checks. You’ll learn what affects the schedule, how to prepare your home, and what to expect from Canadian contractors.
Understanding the Window Replacement Timeline in Canada
A realistic window replacement timeline helps homeowners plan their budget, daily routine, and overall home renovation schedule with less stress. While many people assume window installation happens in a day or two, the full installation process usually starts weeks earlier. It includes inspection, measurements, product selection, ordering, scheduling, installation, and final clean-up.
For most Canadian homes, the timeline can range from a couple of weeks to several months, depending on the size of the project, the season, the type of replacement windows, and product availability. If you are replacing a few standard units, the process may move quickly. If you are updating many custom windows in an older home, project planning becomes more detailed.
Working with experienced window installation professionals can make a big difference. A skilled team will explain each phase clearly, help you avoid delays, and keep your project management on track from the start.
How long does window replacement usually take?
Here is a simple answer many homeowners look for:
Typical timeline at a glance
The full window replacement timeline often looks like this:
- Initial quote and inspection: 1 to 3 days
- Measurements and final product selection: 3 to 7 days
- Manufacturing and delivery of replacement windows: 2 to 8 weeks
- On-site window installation: 1 to 3 days for many average homes
- Final touch-ups and inspection: same day or within a few days
That said, every home improvement project is different. Custom sizes, heritage homes, structural repairs, weather delays, and permit requirements can all affect the final schedule.
Why timelines vary across Canadian homes
In Canada, climate plays a major role in the installation process. Winter installations are possible, but crews may need extra time to protect the home from cold air and moisture. Spring and fall are popular seasons, which can make booking Canadian contractors more competitive. In busy markets such as Toronto, Markham, Hamilton, or Brampton, lead times may be longer during peak renovation periods.
Homes also vary by age and construction style. A newer suburban house may have more predictable framing and easier access. An older home may reveal hidden issues such as water damage, insulation gaps, or rotted trim once the old windows are removed. These are common reasons a home renovation schedule can shift.
If you want a better idea of local availability, it helps to review service coverage for Canadian window service locations before booking your project.
What Happens Before Installation Day
The biggest part of the window replacement timeline usually happens before any tools come out. Good project planning reduces surprises and helps homeowners make informed choices about style, energy efficiency, and cost.
Step 1: Initial consultation and home assessment
The process often begins with a site visit or consultation. A contractor will inspect the existing windows, discuss your goals, and recommend suitable replacement windows for your home. This is the time to talk about drafts, condensation, hard-to-open sashes, outside noise, or rising heating bills.
During this visit, homeowners should ask practical questions such as:
- How long will the full installation process take?
- Are the windows stock or custom-made?
- Will any trim, framing, or insulation repairs be needed?
- How will weather affect the work?
- What warranty is included?
A professional assessment is especially valuable if you are unsure whether you need full replacement or a repair. In some cases, homeowners may benefit from expert window repair for isolated issues, while older or inefficient units are better candidates for full replacement.
Step 2: Measurements and product selection
Once you decide to move forward, exact measurements are taken. This step is critical. Even small measurement errors can delay manufacturing or cause installation-day problems. Accurate sizing is one of the most important parts of project management in any window service project.
You will also choose the details that affect both performance and timing, including:
- Frame material, such as vinyl, wood, or aluminium-clad options
- Glass type, including double- or triple-pane units
- Energy-efficient coatings suited to Canadian weather
- Colour, grille pattern, and hardware finish
- Style, such as casement, awning, slider, or fixed windows
Custom features often improve comfort and curb appeal, but they may add time to the window replacement timeline. If speed matters, ask whether standard-size options are available.
Step 3: Ordering and manufacturing
After measurements are confirmed, the windows are ordered. This is often the longest waiting period in the full installation process. Many replacement windows are made to order, especially for Canadian homes where energy efficiency and proper sealing are essential.
Lead times depend on several factors:
- Manufacturer workload
- Seasonal demand
- Supply chain issues
- Custom shapes or specialty glass
- Large order volume
Homeowners should not assume silence means delay. A good contractor will usually keep you updated as the order moves through production and delivery. If you are comparing providers, look for a company with clear communication and strong local experience in doors and windows services.
How to Prepare for a Smooth Installation Process
Once your installation date is booked, a little preparation can help the project stay on time. Homeowners do not need to do the work themselves, but being ready makes the day easier for everyone.
Getting your home ready
Before the crew arrives, clear the area around each window inside and outside. Move furniture, wall art, blinds, curtains, and fragile items. Outside, trim shrubs or move patio items that may block access. This protects your belongings and gives installers the space they need to work safely and efficiently.
If you have children or pets, plan to keep them away from active work zones. Window installation involves tools, ladders, broken glass removal, and repeated opening of doors.
Planning for weather and daily routines
Canadian weather can change quickly, so flexibility matters. Professional crews usually install one window at a time to reduce heat loss in winter or keep rain exposure to a minimum. Even so, homeowners should expect some noise, dust, and short periods when parts of the home feel cooler or warmer than usual.
If you work from home, schedule meetings away from the noisiest rooms. If you have a security system connected to window sensors, let your provider know in advance. Good project planning helps avoid small problems that can interrupt the home renovation schedule.
Know what can cause delays
Even a well-organized project can run into issues. Common delays include:
- Severe weather
- Hidden rot or water damage around the frame
- Structural adjustments needed for older openings
- Product delivery changes
- Permit or code-related requirements
In some municipalities, building code expectations may affect how windows are installed, especially if the opening size changes or if egress requirements apply in bedrooms. Experienced Canadian contractors understand these standards and can guide homeowners through the process.
If you want help planning your project or confirming the next steps, you can contact our certified technicians for advice tailored to your home, timeline, and renovation goals.
When homeowners understand the early stages of the window replacement timeline, the rest of the project feels far more manageable. Clear expectations, accurate measurements, and careful scheduling lay the foundation for a smoother window installation experience and a more predictable home improvement result.
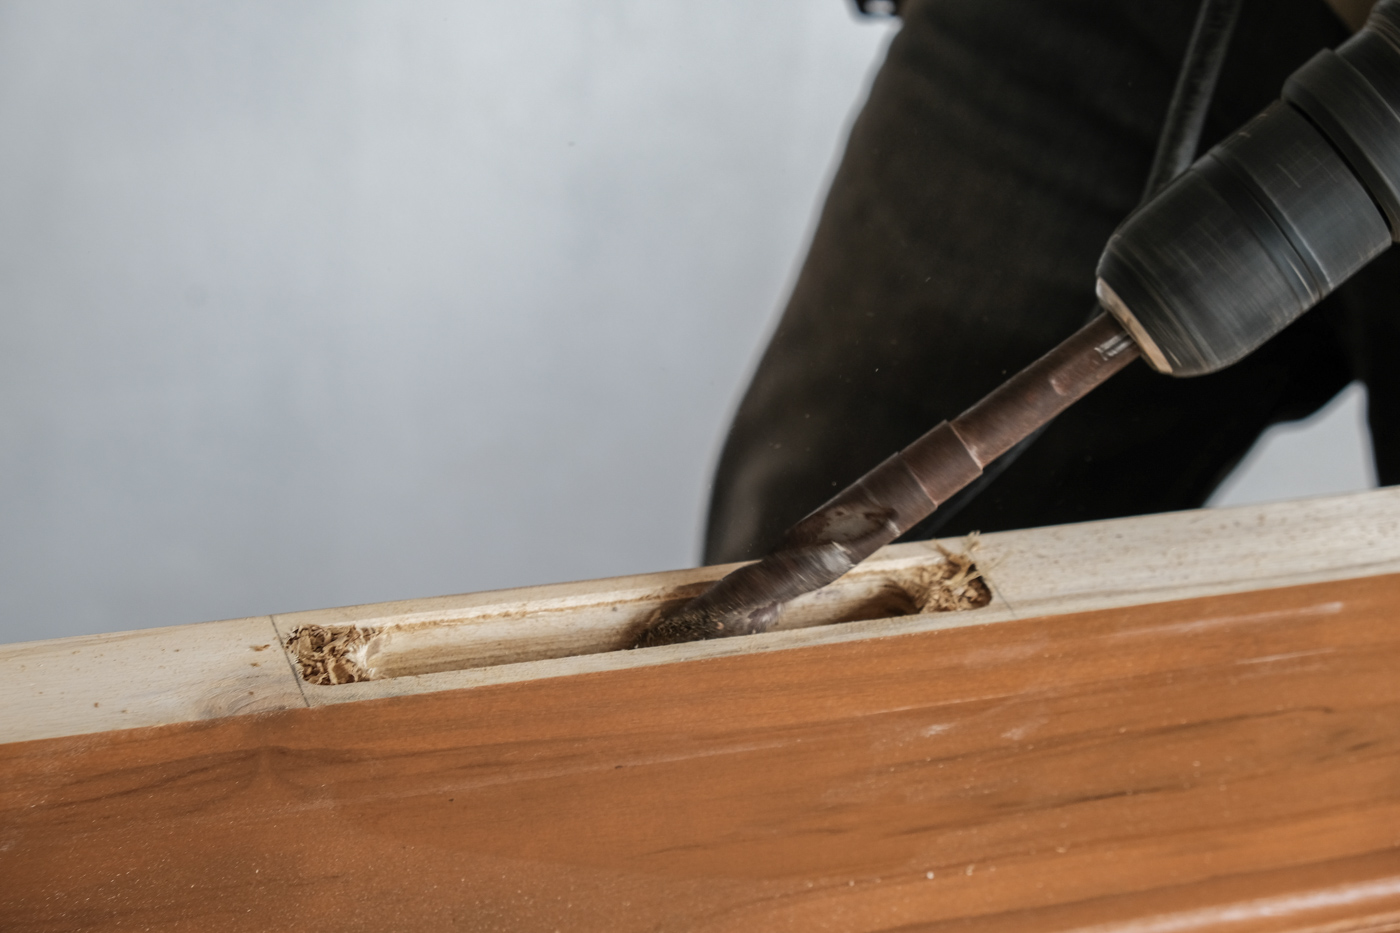
What to Expect on Window Installation Day
Once the ordering stage is complete and your installation date arrives, many homeowners want to know what the actual work will look like. In most cases, window replacement moves faster on-site than people expect, but it is still a detailed process that requires care, accuracy, and attention to weather conditions. A professional crew will usually follow a clear sequence so the installation process stays organized and your home remains protected.
For homeowners in Toronto, Markham, Kitchener, Barrie, Brampton, Hamilton, and other Canadian communities, the day often starts with a quick review of the project. Installers confirm the number of replacement windows, inspect access points, protect flooring and nearby surfaces, and make sure each unit matches the order. This early check helps prevent confusion and keeps the home renovation schedule on track.
Arrival, setup, and protection of your home
When the crew arrives, they generally begin by preparing the work areas inside and outside the home. Drop sheets, protective coverings, and basic safety barriers may be used depending on the layout of the house. Professional teams know that window installation is not just about fitting glass into an opening. It is also about protecting your walls, trim, floors, and landscaping during the work.
Homeowners should expect:
- A walkthrough of the day’s plan
- Confirmation of window locations and styles
- Protection for floors, furniture, and nearby finishes
- Safe removal plans for old glass, frames, and debris
- Discussion of any access or parking needs
This is also a good time to raise last-minute concerns. If there is a room you need to use for work, a sleeping child, or a pet that becomes anxious with noise, let the crew know. Good communication often makes the installation process smoother for everyone.
Removing the old windows
The next step is the careful removal of the existing units. Installers usually work one opening at a time, especially during colder months, to reduce heat loss and keep the interior of the home comfortable. In Canadian winters, this step matters even more because leaving several openings exposed at once can cause unnecessary temperature drops and moisture concerns.
During removal, the crew may take out:
- Interior stops or trim as needed
- Old sashes and frames
- Damaged caulking or insulation
- Rotten wood or deteriorated materials around the opening
This stage can reveal hidden issues that were not fully visible during the first inspection. For example, once the old frame is removed, installers may find water damage, mould, air leakage, or structural wear around the rough opening. These issues are not unusual in older Canadian homes, especially where freeze-thaw cycles, poor drainage, or long-term condensation have affected the surrounding materials.
Preparing the opening for the new unit
Before the new window goes in, the opening must be cleaned, checked, and properly prepared. This step is one of the most important parts of the entire window replacement timeline because even a high-quality product can perform poorly if the opening is not square, level, insulated, and sealed correctly.
Installers may need to:
- Remove old debris and loose materials
- Check for level and plumb alignment
- Repair minor framing issues
- Add insulation or flashing materials
- Confirm that the opening matches the new unit exactly
In some homes, this preparation takes only a few minutes. In others, especially older homes with settling or previous poor workmanship, it can take much longer. This is one reason why two homes with the same number of replacement windows may have very different installation timelines.
Installing and sealing the new windows
Once the opening is ready, the new unit is placed, adjusted, secured, insulated, and sealed. The goal is not only to make the window look good but also to ensure long-term performance in Canadian weather. Proper sealing helps prevent drafts, water penetration, and energy loss during every season.
A standard installation usually includes:
- Positioning the new frame
- Levelling and shimming for a proper fit
- Securing the unit to the structure
- Insulating gaps around the frame
- Applying interior and exterior sealant
- Reinstalling or finishing trim details
Professional installation matters here because small mistakes can lead to major problems later. A window that is slightly out of square may be harder to open, less energy efficient, and more likely to leak. That is why many homeowners choose experienced teams that specialize in window installation rather than treating the project like a simple cosmetic upgrade.
How long does each window take to replace?
Many homeowners ask for a per-window estimate, and while the answer depends on the condition of the home, there are some general guidelines.
Average time per unit
For standard replacement windows in good-condition openings, many installers can complete one unit in about 30 minutes to 1.5 hours. For more complex openings, larger units, or homes with hidden damage, the time per window may increase to 2 to 4 hours or more.
Factors that affect the time per unit include:
- Window size and style
- Main-floor versus upper-storey access
- Condition of the existing frame and wall area
- Need for interior or exterior trim work
- Weather conditions during installation
As a rough example, replacing five to ten standard windows in an average detached home may take one to two days. A larger project with custom shapes, upper-floor access challenges, or structural repairs may take several days.
Factors That Can Extend the Window Replacement Timeline
Although many projects move smoothly from planning to completion, some timelines stretch longer than expected. This does not always mean something has gone wrong. Often, it simply means the project involves conditions that need more care. Understanding these factors can help homeowners plan more realistically and avoid frustration.
Custom windows and specialty products
Custom windows are one of the biggest reasons a project takes longer. If your home has arched windows, oversized openings, unique grille patterns, specialty glass, or non-standard frame colours, manufacturing time is usually longer than for stock units. Custom orders are common in Canadian homes, especially in renovations where homeowners want to improve efficiency without changing the character of the property.
Specialty features that may add time include:
- Triple-pane energy-efficient glass
- Low-E coatings designed for Canadian climates
- Laminated or tempered safety glass
- Decorative grilles or custom hardware
- Large picture windows or shaped units
These features can be worth the wait because they often improve comfort, reduce energy bills, and increase resale appeal. Still, homeowners should ask about lead times early so the full installation process fits their goals.
Seasonal demand across Canada
Timing matters in the home improvement industry. Spring and fall are often the busiest seasons for window replacement because temperatures are moderate and homeowners want to prepare for summer heat or winter cold. During these peak periods, Canadian contractors may have fuller schedules and manufacturers may have longer production queues.
In major service areas such as Toronto and surrounding communities, demand can be especially high. Homeowners who wait until the busiest season to book may face longer scheduling windows than those who plan ahead. Winter projects can sometimes be booked faster, but weather conditions may require extra care on-site.
If your schedule is flexible, ask your contractor whether off-peak installation dates are available. This can sometimes shorten the overall timeline and improve access to preferred appointment slots.
Unexpected structural or moisture issues
One of the most common causes of delay is the discovery of hidden damage after removal begins. Old windows can conceal problems for years. Water may have entered around failed caulking, poor flashing, or deteriorated trim. In some cases, homeowners only notice the issue once the old unit is out and the surrounding structure is exposed.
Typical hidden issues include:
- Rotted wood framing
- Wet or missing insulation
- Mould near the opening
- Cracked masonry or damaged sill areas
- Previous installation errors
These repairs are important and should not be rushed. A contractor who pauses to correct the opening is protecting the long-term performance of the new windows. Skipping repairs to save time often leads to bigger costs later.
Permits, code requirements, and egress rules
Not every window replacement project needs a permit, but some do. If the size of the opening is changing, if structural work is involved, or if the project affects bedroom egress requirements, municipal rules may come into play. Canadian building code expectations can vary by province and municipality, so local knowledge matters.
For example, basement bedroom windows often need to meet egress standards for safe emergency exit. If a homeowner wants to enlarge or alter an opening, the timeline may include permit review, inspections, and added coordination. This is especially relevant during larger home improvement or renovation projects.
Experienced contractors can explain whether your project is a straightforward replacement or whether code-related planning is needed. If your project also includes entry upgrades, professional door installation services may be worth coordinating at the same time to streamline scheduling and improve overall efficiency.
Supply chain and delivery changes
Even when measurements are correct and the product has been ordered on time, delivery dates can shift. Manufacturing backlogs, transportation issues, material shortages, and seasonal demand all affect timelines. This has become more familiar to homeowners in recent years, and it is one reason why clear communication from your contractor is so important.
A reliable company should keep you informed if there is a change in expected delivery. In many cases, delay does not mean the project is in trouble. It simply means the contractor is waiting for the right product to arrive before beginning the on-site work.
After the Installation: Final Checks, Clean-Up, and Next Steps
Many homeowners think the project ends the moment the last window is installed, but there are still a few important steps after the main work is done. Final inspection, clean-up, and homeowner review are all part of a quality installation process. These steps help ensure that the new windows look right, work properly, and perform as expected through Canadian seasons.
Final inspection and performance checks
Once installation is complete, the crew should inspect each unit carefully. This is the time to confirm that the windows open, close, lock, and seal correctly. A proper final check helps catch small issues before the team leaves the site.
Typical inspection points include:
- Smooth operation of sashes or casements
- Correct locking function
- Even spacing and proper alignment
- Secure trim and neat finishing
- Complete interior and exterior sealing
- No visible glass or frame damage
Homeowners should feel comfortable asking the crew to demonstrate how each window works. This is especially helpful if you have chosen a different style than your previous units. Casement, awning, slider, and tilt features can all operate differently.
Clean-up and disposal of old materials
A professional team should also handle basic site clean-up. Old glass, frames, fasteners, packaging, and debris should be removed or organized according to the agreement. Floors and nearby areas should be left tidy, and any dust from trim work should be addressed as much as possible.
Because window replacement can involve cutting, scraping, and material removal, some light dust is normal. However, the home should not be left in disorder. Good clean-up is part of good service.
If your project includes multiple exterior improvements, it can be helpful to work with one company that understands broader doors and windows services. This can reduce coordination problems and support a more consistent finish across the home.
What homeowners should check before signing off
Before the project is considered complete, take a little time to review the work yourself. Walk through the home and check each opening from both inside and outside if possible. You do not need technical expertise to notice whether something looks unfinished or feels off.
Simple homeowner checklist
- Do all windows open and close properly?
- Do locks engage smoothly?
- Is the caulking neat and continuous?
- Are the frames clean and free of damage?
- Is the trim secure and finished properly?
- Has all old material been removed?
- Did you receive warranty and care information?
It is better to raise questions right away than to assume a detail will be fixed later without discussion. Reputable contractors expect homeowners to review the finished job carefully.
Adjustment period after installation
New windows can feel different from old ones in the first few days. You may notice less draft, reduced outside noise, and improved indoor comfort. You may also notice that rooms hold heat more evenly in winter and stay more comfortable during hot summer afternoons. These are positive signs that the replacement windows are doing their job.
At the same time, some materials may settle slightly after installation, and sealants may need time to cure fully depending on weather conditions. Follow any care instructions provided by the installer, especially regarding cleaning, painting nearby trim, or operating certain components immediately after the work is done.
If something does not seem right after a few days, do not ignore it. Minor concerns are usually easier to address early.
When repair may still be needed in other areas
Sometimes a window replacement project highlights issues elsewhere in the home. For example, once new, efficient windows are installed, homeowners may become more aware of drafts around doors, older patio units, or damaged trim in adjoining areas. This does not mean the new windows are faulty. It often means the weakest points in the building envelope have shifted.
In some homes, a full comfort upgrade may involve more than one service. If some openings are not ready for full replacement, or if you have isolated damage in another part of the house, expert window repair can be a practical next step while you plan future improvements.
Practical Tips for Canadian Homeowners Planning a Window Replacement Project
If you are still in the planning stage, there are several ways to make the process easier, faster, and less stressful. A realistic window replacement timeline is not just about how long the contractor works on-site. It is also about how well the project is planned from the beginning.
Book early if timing matters
If you want your new windows installed before winter or before another renovation begins, do not wait until the last minute. Because manufacturing and scheduling can take weeks, early booking gives you more control. This is especially important in busy markets and during peak seasons.
For example, if you are planning exterior painting, siding updates, or a major interior renovation, your windows should be scheduled in a way that supports the full home renovation schedule rather than interrupting it.
Choose products that fit your priorities
Some homeowners care most about speed. Others care most about energy efficiency, appearance, or long-term value. Being clear about your priorities helps your contractor recommend the right product and timeline.
Ask yourself:
- Do I need standard windows quickly, or am I willing to wait for custom features?
- Is winter comfort my main goal?
- Am I trying to reduce noise from traffic or neighbours?
- Do I want to match the style of an older home?
- Am I planning to sell in the near future?
These answers shape both the product selection and the project timeline.
Do not judge the project only by installation speed
Homeowners sometimes focus too much on how many hours the crew spends in the house. While quick installation is convenient, the bigger measure of success is whether the windows are installed properly. A rushed job can lead to air leaks, moisture problems, poor operation, and shorter product life.
The full value of replacement windows comes from the combination of good manufacturing, accurate measurement, and careful installation. That is why choosing qualified professionals is often more important than choosing the fastest available appointment.
Know the signs that it is time to replace instead of repair
Some homeowners begin by wondering whether repair might be enough. In many cases, minor issues such as damaged hardware, small leaks, or worn weatherstripping can be fixed. But there are also situations where full replacement is the smarter long-term choice.
Replacement is often worth considering if you notice:
- Persistent drafts even after minor fixes
- Condensation between glass panes
- Rotting frames or repeated moisture damage
- Windows that no longer open or lock safely
- High energy bills linked to poor insulation
- Multiple windows failing at the same time
If you are unsure which option makes sense, a professional assessment can help you avoid overspending or delaying needed work.
Coordinate windows with other entry and exterior upgrades
Many Canadian homeowners replace windows during a larger improvement project. If you are already upgrading insulation, siding, trim, or entry systems
